Download FocusRIP Download FocusRIP
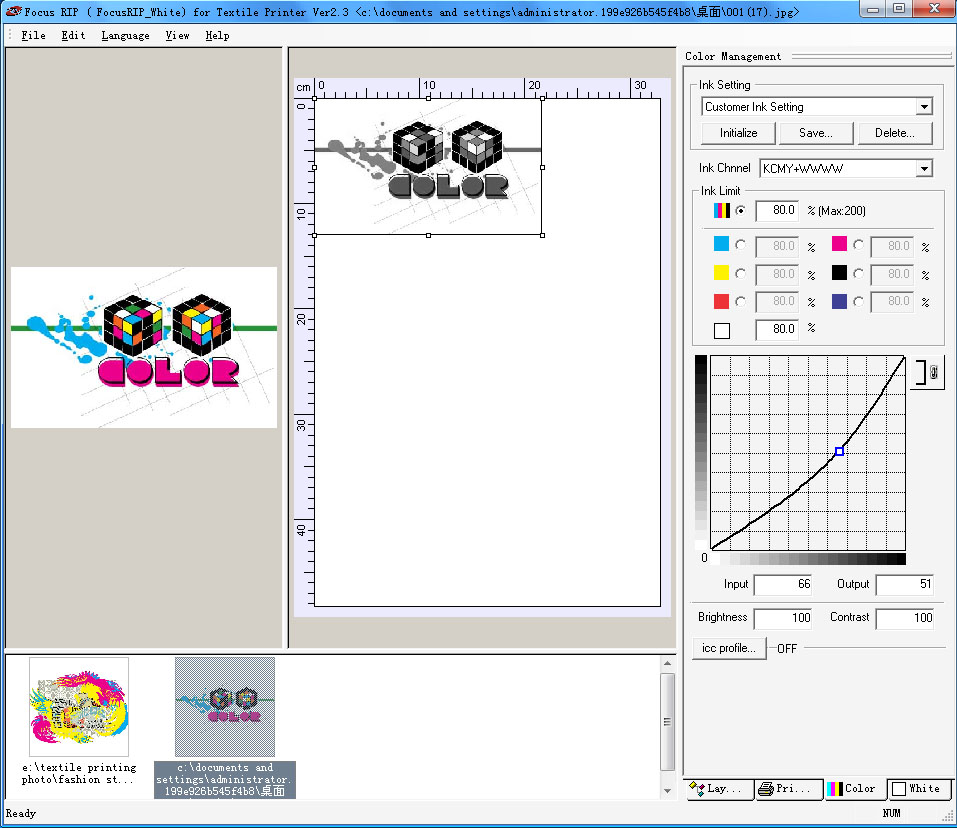
FocusRIP Interface:
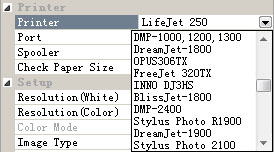
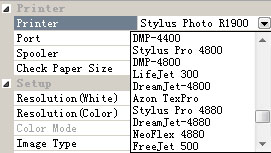
Supported models:


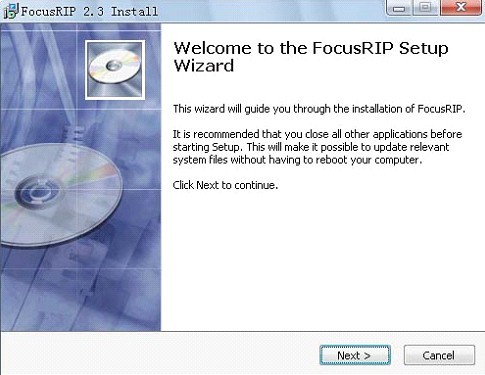
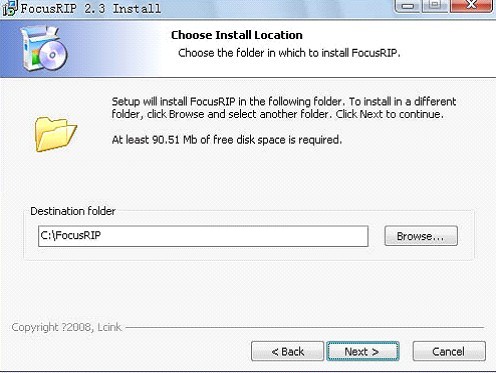
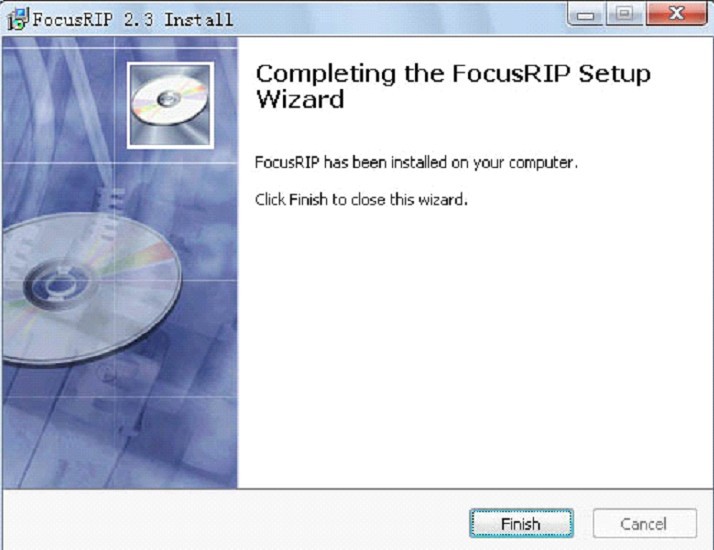
1. Program Intallation
1) Install FocusRIP to your local disk, setup will be automatically started when insert install CD.

l Or, execute Setup.exe if you download files from our Website at www.focusdgt.com or got by our online support.
l If you want to up-grade into the newest FocusRIP version into your system that previous version was installed, you need
to quit excecuted FocusRIP currently.
l Installation for the FocusRIP Printer Driver
Ø The ¡®FocusRIP Printer Driver V2.3¡¯ will be automatically installed into your printer.
Ø If it was installed before, it will not appear any indication of tap showing PS2 driver installation.
Ø Select ¡®Continue¡¯.
l Set Paper on the FocusRIP Printer Driver
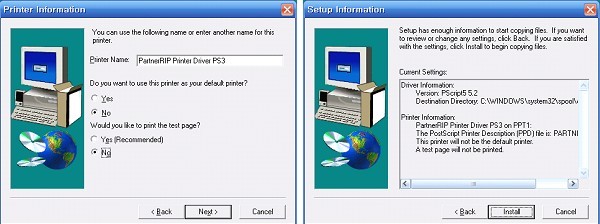
Ø Start Menu -> Printer & Fax -> FocusRIP Printer Driver PS2
Ø Set Print Environment -> High Quality
Ø Select desired paper size.
Ø If there is no desired paper size, select ¡®Postscript User¡¯s Setting Size¡¯ from the paper size.
Ø Insert Width and Height. (eg. Width : 329, Height : 550)
l Execute the FocusRIP
Ø The FocusRIP will be automatically executed by start program and waiting the job at the System Tray.
Ø If there is no screen at the System Tray, you need to execute it from window background.
Ø If you click the mouse, the screen will be immediately shown.

Ø If you use only Textile Printing, you may delete ¡®FocusRIP¡¯ from ¡®Start menu->Start program¡¯.
2) Key Lock(Dongle) Installation
l The USB driver will be automatically installed when you connect Key Lock into USB Port.
l You have to keep the provided Key Lock carefully in order to execute FocusRIP properly.
3) Printer Driver Installation
l Because FocusRIP uses a port from the printer driver, it needs installed driver that is connected with flatbed printer.
4) Compostion of FocusRIP
l FocusRIP provides two EXE files for both normal version and white version.
l Normal version : FocusRIP Ver x.x
Ø The normal version mainly is used for solvent ink based printing or normal colored printing.
l White version : FocusRIP White Ver x.x
2. Start Program
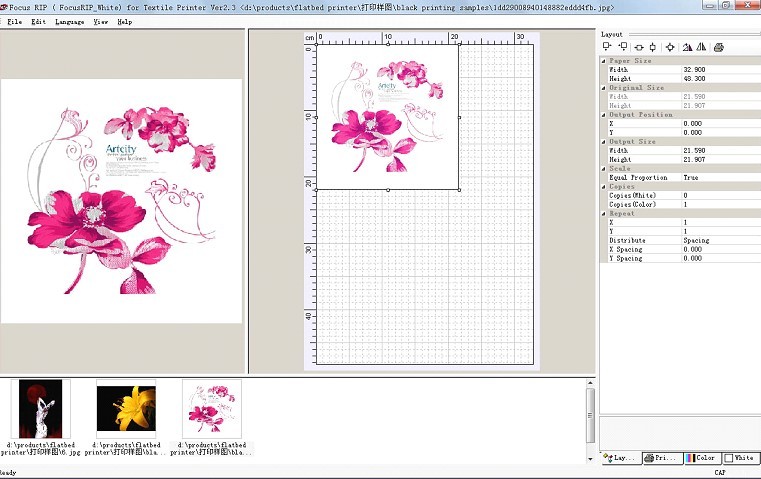
1) Job Screen
2) Initialization for White Printing Job
l Execute ¡®FocusRIP White Ver x.x¡¯ from window background.
l File > Page Margin Setup¡
l File > Unit > Inch, mm, cm
l Layout > Paper Size > Width, Height
Ø Set Width & Height of flatbed printer
l Printer > Printer : Currently connected printer
l Printer > Port : Currently connected printer port
3) Open File
l File > Open : Select desired image
l Compatible file format : eps, ps, tif, jpg, bmp file
l Recommendable file format : eps, ps, tif file with CMYK mode
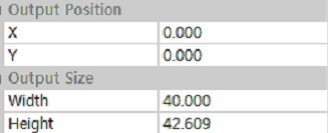
l Layout > Adjust ¡°Output Position, Output Size¡±
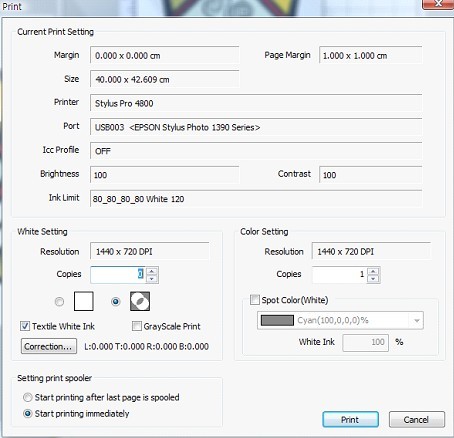
4) Print
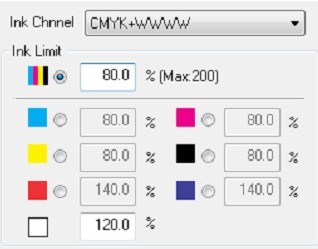
l Color > Set ¡°Ink Channel and Ink Amount¡±
Ø Normal Media : 30 %
Ø Solvent ink with pre-coat : 35%
Ø Direct Solvent Ink : 20 ~ 30%
Ø Textile Ink : 80 ~ 120%
Ø Adjust ink amount according to characteristics of media & image.
l File > Print¡
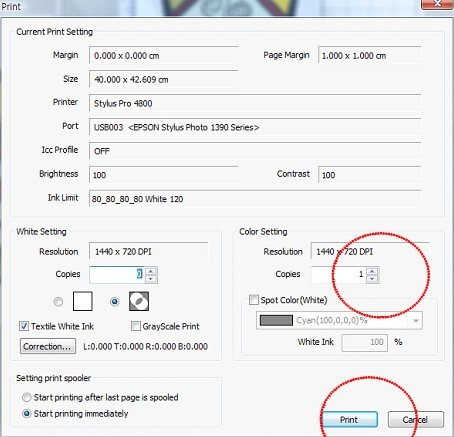
l
Set as ¡°White Copies : 0, Color Copies : 1¡±
Then click ¡°Print¡±
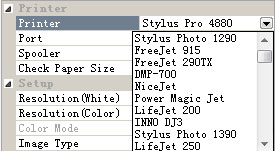
Choose your printer port same as your printer, this rip support most of Epson model, such as epsonR210,
R230, R290,R320, R1390,R1800,R1900,Epson48XX, 78XX,98XX¡
l Can you see print start? If yes, congratulation!!!
If print fails, check printer type and port and connected printer properly.
3. Menu
1) File
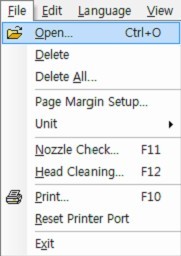
l Open
Ø Open file you want to print out.
Ø Compatible file format : eps, ps, tif, jpg, bmp file
Ø Recommendable file format : eps, ps, tif, files with CMYK mode
l Delete
l Delete All
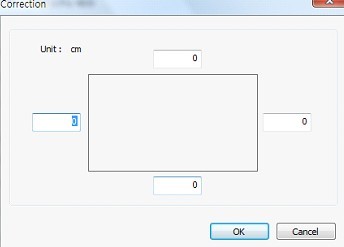
l Page Margin Setup
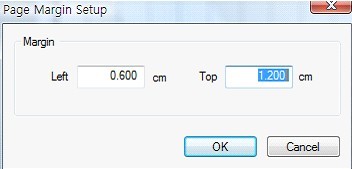
Ø Adjust starting point in case there is ruler or frame for T-shirt printing on the flatbed.
l Unit
Ø Inch, MM, CM
l Nozzle Check
l Head Cleaning
l Print
Ø How to print white ink
¨¹  Photo mode : In case of photo image, print whole image with white ink. Photo mode : In case of photo image, print whole image with white ink.
¨¹  Graphic mode : Print only colored image with white ink. Graphic mode : Print only colored image with white ink.
Ø Textile White Ink
¨¹ Check this flag when you want to print on textile with white ink.
This flag enables to increase white ink amount specially for textile printing.
¨¹ In case of white solvent ink, you don¡¯t need to check this flag.
Ø Solvent White Ink
¨¹ Un-check this flag when you want to print out with white solvent ink.
This flag enables to increase white ink amount specially for the textile printing.
¨¹ In case of white textile ink, you have to check this flag.
Ø Gray Scale Print
¨¹ Enables to print grayscale with white ink.Correction
¨¹ In case that you print color image by use of photo mode, there might be overprinted pixel with white area. This
function enables to reduce overprinted white area.
Ø Spot Color(White)
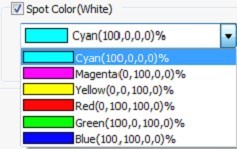
¨¹ When you print colored image, selected color must be printed out with white ink.

¨¹ When you print out by use graphic mode, white area will not be printed all area. In this case, there are two
ways of print methods. One is for photo mode, The other is for Spot Color(White).

¨¹ Above image shows that inside of white area is filled with Magenta 100%. In this case, if you print out by use
of Graphic mode, Magenta area will be printed with white ink. If you check flag on Spot Color(White), Magenta
100% area will be printed with white ink.
¨¹ As Spot Color enables to give same effect with double white printing, you can get the high quality
¨¹ If you want to print out with Spot Color, the target image must be saved as CMYK image.
¨¹
Ø Setting print spooler
l Reset Printer Port
Ø In case of adding printer driver during FocusRIP is activating, you can bring added port by use of this function.
l Exit
2) Edit
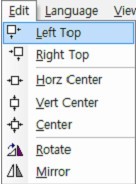
l Left Top
l Right Top
l Horz Center
l Vert Center
l Center
l Rotate
Ø Rotation for 90, 180, 270 degree
l Mirror
3) Language
4) View
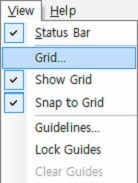
l Status Bar
l Grid¡
Ø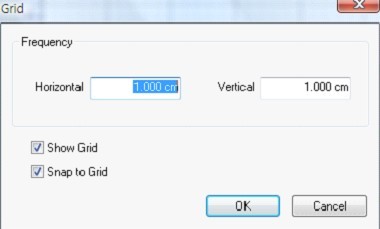
l Show Grid
l Snap to Grid
l Guidelines¡
Ø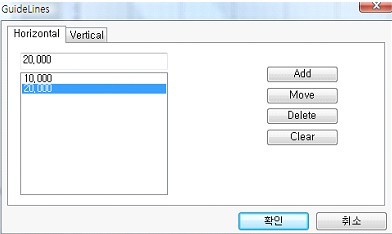
l Lock Guides
l Clear Guides
4. Layout
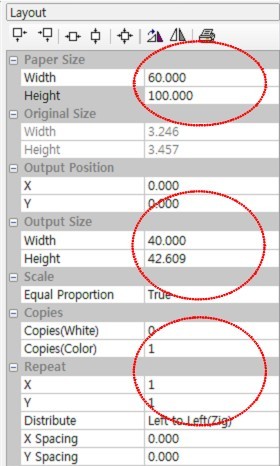
l Paper Size
Ø Size of flatbed
l Original Size
l Output Position
Ø Start point for printing
l Output Size
Ø Image size for printing
l Scale
l Copies
l Repeat
Ø Left to Left(Zig)
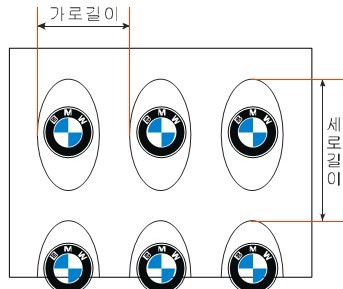 x spacing, y spacing x spacing, y spacing
Ø Spacing(Image)
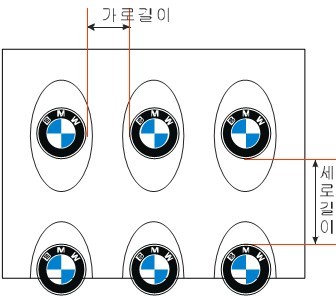 x spacing, y spacing x spacing, y spacing
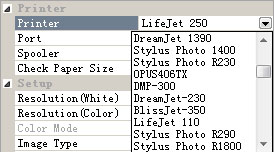
5. Printer
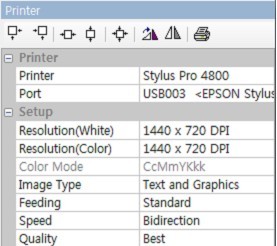
l Printer
Ø Models for flatbed printers
l Port
Ø Port connected with printer
l Resolution
l Image Type
l Feeding
Ø Select Standard(Sheet) or Roll Feed according to models.
l Speed
Bi-direction is faster than uni-direction, printing quality of Bi direction is better than Unidirection.
l Quality
Ø Select proper mode among Best, Good, Normal, Draft according to printing jop.
Ø Notice) If print job is temporarily stopped, you had better to use ¡®Normal¡¯ because your computer system is
too slow.
6. Color

l Ink Setting
Ø You can save and import ink amount from each color pane and icc profile as well.
l Ink Channel
Ø 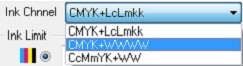
Ø You can select ink mode that equipped with current printer.
l In, k&, , nbsp;Limit<, /SPAN>
Ø Normally, you can adjust total ink limit with %
Ø Normal media : 30 %
Ø Solvent ink (with pre-coat) : 35% ~ 50%
Ø Direct solvent ink : 20 ~ 30%
Ø Solvent White Ink : 60 ~ 100%
Ø Textile ink : 80 ~ 120%
Ø Textile White ink : Normally set as 120 ~ 150%
Ø Adjustment depending on characteristics of media & image.
Ø If you need to adjust a certain ink color, you can adjust ink amount and ink curve.
Ø Red, Blue Ink : Only for Epson Stylus R1800
l Curve
Ø Operation 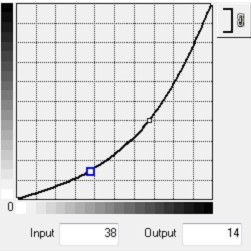
¨¹ Normarlly, you can adjust color of image by use of basic curve .
¨¹ If you click left button of mouse on curve, you can add point.
¨¹ If you click left button of mouse on curve, you can move point.
¨¹ If point is changed into blue color, you can modify Input, Output values.
¨¹ If you click right button of mouse, point will be disappeared.
Ø Basic 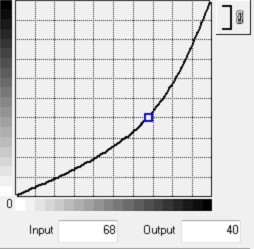 
Ø Bright 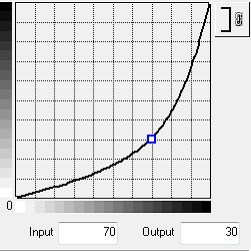 
Ø Dark 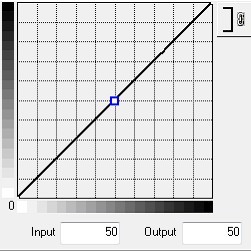 
l Brightness
l Contrast
l Icc profile
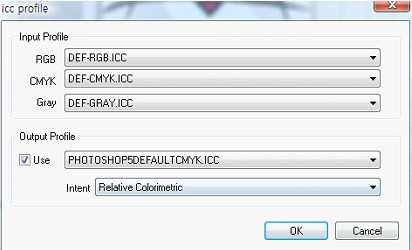
Ø The icc profile uses CMYK mode.
Ø All available icc profiles are saved into ¡®C:\FocusRIP\Profile\CMYK\¡¯. You can paste an icc profile that you
made by yourself onto above folder.
Ø Normally, you can use ¡®Perceptual¡¯ for photo, ¡®Relative Colormetric¡¯ for graphic image.
6. Print by outer program
1) This function is only available for normal version.
2) Select ¡®FocusRIP Printer DriverV2.3.¡¯ instead of current printer.
3) If you activate print menu, below FocusRIP screen will be appeard.
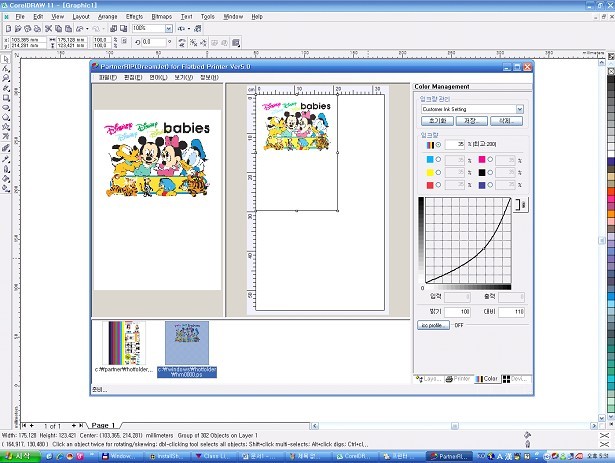
4) Continue to print job you want.
5) If you want to cancel print job, delete current data and click ¡®Go to system tray¡¯ from ¡®File¡¯ menu.
6) When print job is finished, FocusRIP will be hidden into System Tray.
7) Exit
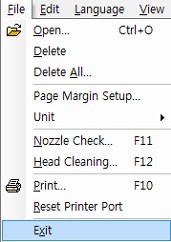
l FocusRIP can be terminated by use of ¡®Exit¡¯ from ¡®File¡¯ menu. If you click close button, FocusRIP will be
hidden into system tray.
l If you terminate FocusRIP, FocusRIP will not be seen on the screen even though do print job by use of ¡®FocusRIP
Printer Driver Printer " by use of CorelDraw or other application program. In this case, printed data will be seen
on the next execution of FocusRIP
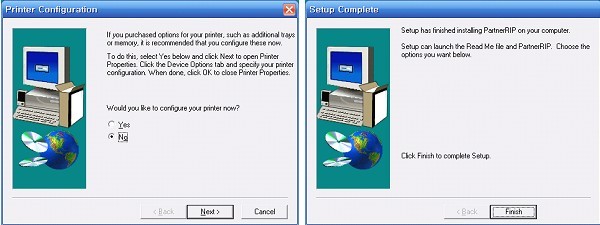
7. Installation of ¡®FocusRIP Printer Driver PS2¡¯ on Windows Vista
1) Extract SetupEng.zip or SetupKor.zip
2) Move to setupeng\setup from the extracted folder of my computer.
3) Select setup.exe and click ¡®properties¡¯ by clicking right button of mouse.
Select ¡®Windows XP¡¯ and click ¡®ok¡¯ button.
4) Execute Setup.exe.
 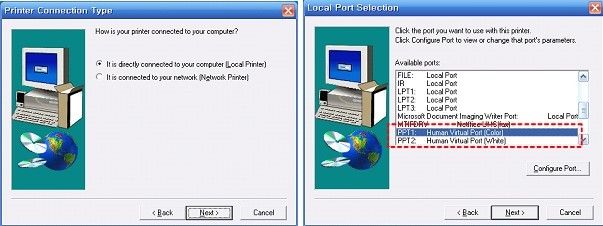
l Select PPT1 from available port.
 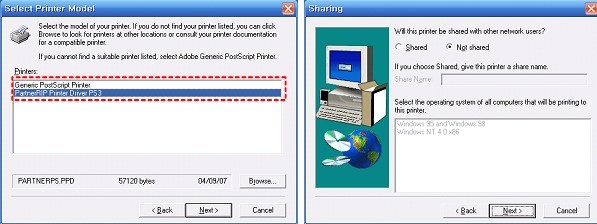
l Set driver as ¡®FocusRIP Printer Driver PS2¡¯.
Any question please reply to our focus support team:
Focus digital technology co.,ltd.
ADD: 10Building, 99Huafa Road, Shanghai 200231, China
Tel: +86 21 61284383 61284384
Fax: +86 21 61284383
Cell: 0086 13661612799
Skype: support_focus
Email: support@focusdgt.com
Website: www.focusdgt.com , ace=Arial>l Delete
l Delete All
l Page Margin Setup
Ø Adjust starting point in case there is ruler or frame for T-shirt printing on the flatbed.
l Unit
Ø Inch, MM, CM
l Nozzle Check
l Head Cleaning
l Print
Ø How to print white ink
¨¹ Photo mode : In case of photo image, print whole image with white ink.
¨¹ Graphic mode : Print only colored image with white ink.
Ø Textile White Ink
¨¹ Check this flag when you want to print on textile with white ink.
This flag enables to increase white ink amount specially for textile printing.
¨¹ In case of white solvent ink, you don¡¯t need to check this flag.
Ø Solvent White Ink
¨¹ Un-check this flag when you want to print out with white solvent ink.
This flag enables to increase white ink amount specially for the textile printing.
¨¹ In case of white textile ink, you have to check this flag.
Ø Gray Scale Print
¨¹ Enables to print grayscale with white ink.Correction
¨¹ In case that you print color image by use of photo mode, there might be overprinted pixel with white area. This
function enables to reduce overprinted white area.
Ø Spot Color(White)
¨¹ When you print colored image, selected color must be printed out with white ink.
¨¹ When you print out by use graphic mode, white area will not be printed all area. In this case, there are two
ways of print methods. One is for photo mode, The other is for Spot Color(White).
¨¹ Above image shows that inside of white area is filled with Magenta 100%. In this case, if you print out by use
of Graphic mode, Magenta area will be printed with white ink. If you check flag on Spot Color(White), Magenta
100% area will be printed with white ink.
¨¹ As Spot Color enables to give same effect with double white printing, you can get the high quality
¨¹ If you want to print out with Spot Color, the target image must be saved as CMYK image.
¨¹
Ø Setting print spooler
l Reset Printer Port
Ø In case of adding printer driver during FocusRIP is activating, you can bring added port by use of this function.
l Exit
2) Edit
l Left Top
l Right Top
l Horz Center
l Vert Center
l Center
l Rotate
Ø Rotation for 90, 180, 270 degree
l Mirror
3) Language
4) View
l Status Bar
l Grid¡
Ø
l Show Grid
l Snap to Grid
l Guidelines¡
Ø
l Lock Guides
l Clear Guides
4. Layout
l Paper Size
Ø Size of flatbed
l Original Size
l Output Position
Ø Start point for printing
l Output Size
Ø Image size for printing
l Scale
l Copies
l Repeat
Ø Left to Left(Zig)
x spacing, y spacing
Ø Spacing(Image)
x spacing, y spacing
5. Printer
l Printer
Ø Models for flatbed printers
l Port
Ø Port connected with printer
l Resolution
l Image Type
l Feeding
Ø Select Standard(Sheet) or Roll Feed according to models.
l Speed
Bi-direction is faster than uni-direction, printing quality of Bi direction is better than Unidirection.
l Quality
Ø Select proper mode among Best, Good, Normal, Draft according to printing jop.
Ø Notice) If print job is temporarily stopped, you had better to use ¡®Normal¡¯ because your computer system is
too slow.
6. Color
l Ink Setting
Ø You can save and import ink amount from each color pane and icc profile as well.
l Ink Channel
Ø
Ø You can select ink mode that equipped with current printer.
l In, k&, , nbsp;Limit<, /SPAN>
Ø Normally, you can adjust total ink limit with %
Ø Normal media : 30 %
Ø Solvent ink (with pre-coat) : 35% ~ 50%
Ø Direct solvent ink : 20 ~ 30%
Ø Solvent White Ink : 60 ~ 100%
Ø Textile ink : 80 ~ 120%
Ø Textile White ink : Normally set as 120 ~ 150%
Ø Adjustment depending on characteristics of media & image.
Ø If you need to adjust a certain ink color, you can adjust ink amount and ink curve.
Ø Red, Blue Ink : Only for Epson Stylus R1800
l Curve
Ø Operation
¨¹ Normarlly, you can adjust color of image by use of basic curve .
¨¹ If you click left button of mouse on curve, you can add point.
¨¹ If you click left button of mouse on curve, you can move point.
¨¹ If point is changed into blue color, you can modify Input, Output values.
¨¹ If you click right button of mouse, point will be disappeared.
Ø Basic
Ø Bright
Ø Dark
l Brightness
l Contrast
l Icc profile
Ø The icc profile uses CMYK mode.
Ø All available icc profiles are saved into ¡®C:\FocusRIP\Profile\CMYK\¡¯. You can paste an icc profile that you
made by yourself onto above folder.
Ø Normally, you can use ¡®Perceptual¡¯ for photo, ¡®Relative Colormetric¡¯ for graphic image.
6. Print by outer program
1) This function is only available for normal version.
2) Select ¡®FocusRIP Printer DriverV2.3.¡¯ instead of current printer.
3) If you activate print menu, below FocusRIP screen will be appeard.
4) Continue to print job you want.
5) If you want to cancel print job, delete current data and click ¡®Go to system tray¡¯ from ¡®File¡¯ menu.
6) When print job is finished, FocusRIP will be hidden into System Tray.
7) Exit
l FocusRIP can be terminated by use of ¡®Exit¡¯ from ¡®File¡¯ menu. If you click close button, FocusRIP will be
hidden into system tray.
l If you terminate FocusRIP, FocusRIP will not be seen on the screen even though do print job by use of ¡®FocusRIP
Printer Driver Printer " by use of CorelDraw or other application program. In this case, printed data will be seen
on the next execution of FocusRIP
7. Installation of ¡®FocusRIP Printer Driver PS2¡¯ on Windows Vista
1) Extract SetupEng.zip or SetupKor.zip
2) Move to setupeng\setup from the extracted folder of my computer.
3) Select setup.exe and click ¡®properties¡¯ by clicking right button of mouse.
Select ¡®Windows XP¡¯ and click ¡®ok¡¯ button.
4) Execute Setup.exe.
l Select PPT1 from available port.
l Set driver as ¡®FocusRIP Printer Driver PS2¡¯.
Any question please reply to our focus support team:
Focus digital technology co.,ltd.
ADD: 10Building, 99Huafa Road, Shanghai 200231, China
Tel: +86 21 61284383 61284384
Fax: +86 21 61284383
Cell: 0086 13661612799
Skype: support_focus
Email: support@focusdgt.com
Website: www.focusdgt.com |